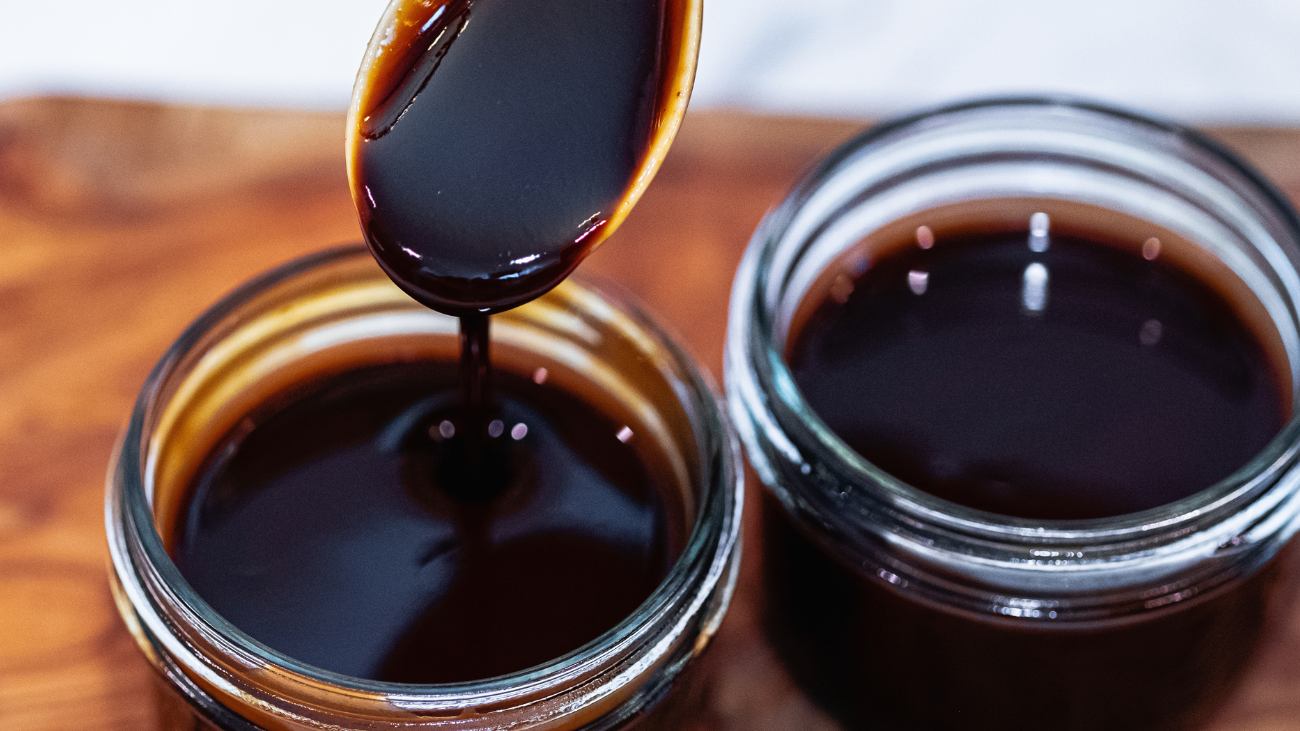
I got so many audiences requesting homemade oyster sauce.The reason it took me this long is that I spent a lot of time researching the commercial oyster sauce-making process, thenI tested and modified this recipe for home cooking. Trust me, this is going to be the best homemade oyster sauce recipe.

INGREDIENTS (makes about 1.3 lb / 600g of oyster sauce)
To make the oyster liquid
- 1 lb (454g) of shucked oyster (the weight includes the liquid, the actual oyster is only 10 oz)
- 6 cups (1.4 L) of water
- 1 tbsp (17g) of salt
- 1 shallot
- 1 scallion
- 2 cloves of garlic
- 1/2 inch of ginger, sliced thinly
To make the Caramel Solution
- 10 tbsp (125g) of sugar
- 2 cups of water
To Season and Thicken the Oyster Sauce
- 2 tbsp + 2 tsp (45g) of salt
- 1.5 tbsp (25 g) of dark soy sauce
- 1 tbsp of MSG, optional
- Cornstarch water (3 tbsp of water mixed with 1.5 tbsp of cornstarch)
INSTRUCTIONS
I have got here 1 lb of shucked oysters. If it comes in a can like this, there will be a lot of liquid. Do not discard that and do not wash the oysters either, otherwise, you are wasting flavors. Another tip I have is that if you eat shucked oysters often, you can collect the liquid by freezing it. Once you get a lot, you can just make oyster sauce out of the liquid.

Dissolve 1 tbsp of salt into 6 cups of water. This amount of salt is not the final seasoning, we still have to adjust the flavor at the end. However, a salt solution helps to extract more umami elements from the oysters.

Pour the oysters, including the liquid from the can, into a saucepot. Add 1 cup of the salt solution and reserve the rest for later use.
Bring the oyster and water to a boil and simmer on low heat for 5 minutes. Pour everything through a sieve.
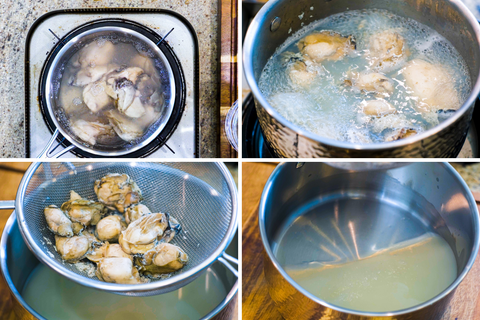
Now you got two things, the blanched oysters and the blanching liquid. Traditionally, we will preserve the blanched oysters by sun-drying them. You can use the dried oysters to make other meals. We will also simmer down the blanching liquid to get some oyster sauce. So originally, the oyster sauce was a by-product of dried oysters.

However, that is not the method that I am going to show you today for two reasons. First, with this amount of blanching liquid, you will end up with a tiny bit of oyster sauce, like a few tbsp. To make a whole bottle, you have to go through 15 kg of shucked oysters, which is not worth the money and the effort. Seconds, I assume most of you are not Chinese, so the dried oyster becomes the by-product that you probably never gonna use.
To continue, put the blanched oysters into a blender along with 1/2 inch of ginger, 2 cloves of garlic, 1 scallion, and 1 shallot. Pour in 1 cup of the salt solution then blend everything into a puree. Make sure you use a powerful blender so you can maximize the flavor.

Pour the oyster puree back into the saucepot and simmer it for another 5 minutes. Then let it go through a cheesecloth. The puree is hot you can cool it down with some of the remaining salt solution so you can squeeze it with your hand. Don’t forget to rinse the blender cup.

Continue to rise with the rest of the salt solution in batches. The squeezing will take about 15 minutes. In the factory, this process is done with the biological enzymolysis technology and Centrifugal machines. We don’t have the equipment, so we are using a blender and cheesecloth at home.

Now, you can discard the solid parts of the oysters. We don’t need that anymore. After all the work, we collected a big pot of oyster liquid, which looks kind of like soy milk LOL! Well, you can tell that it has much more flavor compared to the first batch of blanching liquid.

The next step is to simmer it down. Bring the liquid to a boil. Then turn the heat to low and evaporate it for 1-1.5 hours. Every stove is different. You will have to keep an eye on the pot so it doesn’t evaporate to dry.

In a sauce pot, add the sugar. Then turn the heat to medium-low. Wait for a few minutes and you will see the edge start changing color. You can stir to even it out. Continue to heat until all the sugar is melted and the color becomes golden brown. This process is very fast, like 6-8 minutes or so. Now we pour in 2 cups of water. Be careful, don’t let the steam burn you. Put on the lid and bring it to a simmer over medium heat. Stir to make sure the caramel is fully dissolved. Turn off the heat and remove it to the side.
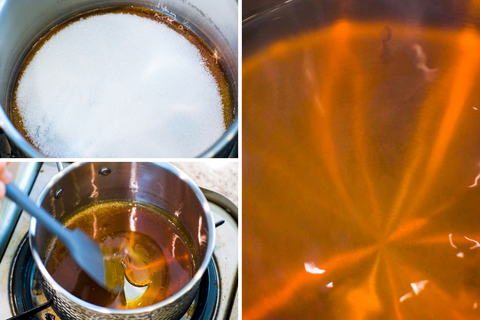
A lot of factories use sugar directly, but I think the caramelization does add a nice taste to the oyster sauce.
Now let’s bring back the oyster liquid and check it out. It has been 45 minutes. You can see on the side, the color changes to brown already. We want all the liquid to turn into a light brown color. Looks like it still needs some time to go so I waited for another 15 minutes. You will see some big bubbles, that means it is very thick. You have to be careful here not to burn it. Otherwise, it will bring a bitter taste.

Turn the heat to the lowest and continue to stir for 2 more minutes. It will get thicker and thicker. The color will continue to darken a little bit more. Eventually it becomes sticky like glue. This is what we called oyster concentrate. It is too flavorful to cook with. You have to dilute it with the caramel sugar solution that we made. Remove the pot from the stove and take some time to stir well. This gonna take a while because the oyster paste is very sticky.

The ratio between the amount of oysters that you started with and the water that you used to make the caramel solution decides the quality of of your oyster sauce. The part where you add water, blend, and go through a cheesecloth, doesn’t matter because no matter how much water you used, you evaporated it all.
From all those oyster sauce-making documents that I read, I see some factories do a 1 to 10 ratio, which is pretty decent quality; some cheap ones dilute it more than 100 times. I want to make my oyster sauce better quality; that’s why I didn’t use that much of water while making the caramel solution. With this ratio, the cost of making this oyster sauce at home is not cheaper than buying it from the store unless you want to dilute it more. If you are going to dilute with more water, you have to adjust the seasonings by an equal ratio.
Once all the oyster paste is dissolved, it should look very close to oyster sauce. Put it back on the stove and do the final adjustment:
- 2 tbsp +2 tsp of salt in addition to the first tbsp that we added to the water. I did the math based on the nutrition fact label. With my measurement, you can equally interchange the store-bought with the homemade for any recipe that asks for oyster sauce. Of course, if you want to make it low sodium, you can.
- 1.5 tbsp of dark soy sauce for the color. I do want to mention that dark soy sauce contains wheat, so if you are on a gluten-free diet, you can skip it. The color is going to be different, but it doesn’t affect the taste.
- Most of oyster sauce factories like to add Monosodium Glutamate, AKA MSG, as a flavor enhancer. That is because they diluted the oyster paste too much. With my ratios, I don’t think you need that. However, if you are a fan of Uncle Roger, feel free to dump in 1 tbsp of MSG.
- Thicken the sauce with some cornstarch water (3 tbsp of water mixed with 1.5 tbsp of cornstarch). Add it in batches and keep an eye on the consistency. Stir over low heat until thickened.
- Most commercial oyster sauce contains additives such as carrageenan or Guar gum for consistency and preservative for longer shelf life. All of that is not necessary for home cooking, and it does not affect the taste.

Now, you have made homemade oyster sauce from real oysters. It is very important to store it correctly.
What I normally do is putting them in multiple mason jars. I will keep one in the fridge, which will stay good for 2 months. I will put the rest in the freezer. For up to 12 months. Don’t need to worry that the glass jar will break because the sauce is not going to solidify due to the high sugar and salt content.

Homemade VS Commercial Oyster Sauce

I am comparing it with this Lee Kum kee premium oyster sauce which is a good quality option. A lot of oyster sauces on the market are not real, they should be called oyster-flavored seasoning.
The difference is significant. Although the sweetness and saltiness are similar because, you know, I calculated the measurement perfectly, the oyster flavor and umami taste are so much stronger. It will make a difference if you use it for recipes that ask for a decent amount of oyster sauce.
You get so many benefits from making it yourself, it tastes better, no food additives, and you can do low sodium, less sugar, or gluten-free.
I hope you give it a try and leave me a comment to let me know how it goes. If you want to see me making other store-bought sauces or ingredients from scratch, such as light and dark soy sauce, hoisin sauce, soybean paste, fermented black beans, Lao gan ma chili sauce, or whatever Chinese ingredients that you can’t find, leave a comment below and I will make it in the future.
